You don’t need to be a DIY expert to measure your windows. It’s easier than you think. All you’ll need is a steel tape measure and some know-how. You’ll be done in the time it takes to make a pot of coffee. Over 99% of our customers measure and install their own window treatments and you can, too! At Blindsgalore, we know how to make DIY EZ.
![]()
Why Accurate Measurements are Important
Quick Measuring Tips for Accuracy
- • Use a steel measuring tape.
- • Measure to the nearest 1/8″.
- • Measure all windows, even if they look the same.
- • Do not make any deductions.
![]()

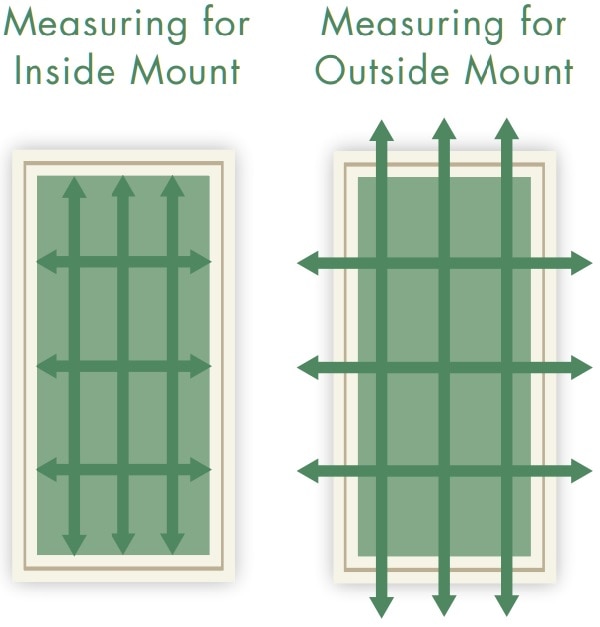
The first step towards taking accurate measurements is determining which type of mount you would prefer for your window. Almost all blinds and shades give you an option for either an inside or an outside mount.
![]()
How to Measure for an Inside Mount
Step-by-Step Measuring Guide for an Inside Mount
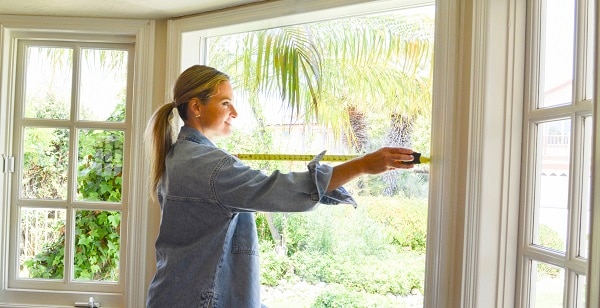
- Step 1: Measure the width of your window frame in 3 places: Top, middle and bottom. Round down to the nearest 1/8″ inch. Record the shortest measurement.
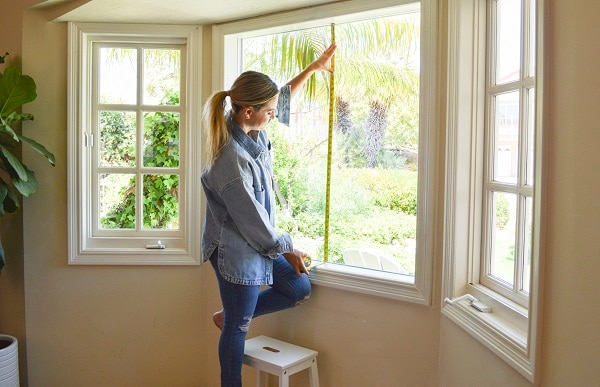
- Step 2: Measure the height of your window in 3 places: Left, middle and right. Round up to the nearest 1/8″ inch. Record the longest measurement.
- Step 3: Measure the depth of your window frame, from casing to edge. Make note of any obstructions, such as cranks or double-hung windows. The shortest length in this space will be your recommended depth.
Note: Depth requirements vary by window treatment, so refer to the Product Detail Specifications on your product.
Benefits of an Inside Mount
- • Mounted within the window frame
- • Provides a clean, uncluttered look
- • Requires a depth measurement
![]()
How to Measure for an Outside Mount
Step-by-Step Measuring Guide for an Outside Mount
- Step 1: Measure the width of the area you want to cover to the nearest 1/8″. We recommend adding 3 inches (1½” on each side) to help eliminate light gaps and ensure privacy. Record this measurement. No deductions will be taken.
- Step 2: Measure the height of the area you want to cover, including extra overlap. We recommend adding at least 2″ inches of space above the window trim to leave room for the mounting brackets. Record this measurement. No deductions will be taken.
Benefits of an Outside Mount
- • Mounted above or around the window
- • Can make your window appear larger
- • Requires at least 2″ of flat space to mount
![]()
After you’ve taken all your measurements and customized all the details online, all you have left to do is sit back and wait for delivery. That wasn’t so bad, was it? You could even argue that the tape measure did most of the work. Don’t worry, we won’t tell anyone. The right measurements ensure that not only will your custom window treatments look perfect, they’ll fit perfect too. As usual, don’t be afraid to reach out to our Design Experts if you have any questions.


