Off-the-shelf blinds rarely fit a real window. Pre-built cutdowns from big box stores come close on paper and miss in practice, leaving you with a heavy stack of extra slats piled at the bottom of the sill. Those stacks block your view, strain the lift mechanism, and make every morning lift a small workout. That’s the problem most DIYers are trying to solve when they ask how to shorten blinds at home.
Shortening blinds yourself is possible. Cutting them to size on the width is also possible, with limits. Before any saw or scissors come out, the smarter first move is a custom replacement built to your exact window. Our team handcrafts every set to order, ships in as little as 5 to 7 business days, and backs the order with a 30-day exchange guarantee. If you’re still set on the DIY route, the rest of this guide walks through every step, every tool, and every common mistake we see.
Can you shorten blinds at home using a DIY approach?
Yes, with care. The DIY spirit is alive and well, and a careful homeowner with the right tools can absolutely shorten a set of horizontal blinds at the kitchen counter. A few warnings before the cuts start.
Blinds are delicate. Inside the headrail are fragile mechanisms that depend on precise cord routing and even tension. One wrong move turns a working set into a paperweight.
The right technique varies by type. Vertical and mini blinds are more forgiving. Real wood blinds chip easily and need a fine-tooth blade. The wrong tool on the wrong material is the fastest way to a costly mistake.
Read the instructions that came with the product first. Our in-house experts are also one phone call away at (877) 702-5463 if you want a real person to walk through it with you before you start.
When is it necessary to shorten blinds?
Window blinds are meant to frame a window, not block it. A blind that piles up at the sill turns into a wall instead of a gateway for sunlight and fresh air. Oversized blinds also create a few real problems beyond the look:
- A thick stack of extra slats is a fire hazard near a sunny window.
- More slats mean more weight, which strains the lift mechanism every time you raise or lower the blinds.
- Off-the-shelf cutdowns often hang an inch or two below the sill, collecting dust and bumping furniture.
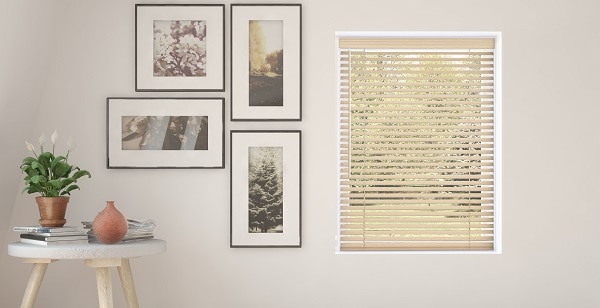
A blind that lands cleanly at the bottom of the window looks better, lifts easier, and lasts longer.
What types of blinds can be shortened?
The short answer, no pun intended: blinds with slats can be adjusted. Shades cannot. Here’s the breakdown.
Vertical blinds
Vertical blinds usually cover sliding glass doors and patios with slats that hang down from a top track. The slats themselves can sometimes be shortened from the bottom by carefully clipping them to length, but the more common issue is twisted or missing slats from heavy use. Our vertical blind repair checklist covers the fixes most people actually need.
Horizontal blinds
The most popular window covering in American homes. Wood blinds, faux wood blinds, venetian blinds, and mini blinds all fall under this category. Anything with traditional horizontal slats. The how-to below applies to every horizontal style.
The DIY approach can be tempting. Weighing the savings against the risks matters. Shortening blinds at home might save money upfront, but a botched cut means a full replacement anyway, plus the cost of the original set and the time spent. For a lot of customers, a custom order from the start is the cleaner path.
How to shorten window blinds: step-by-step
If you’ve decided to take on the project, patience and precision are everything. These steps apply to horizontal blinds only.
Step 1: Gather your tools
- Measuring tape
- Pencil or marker
- Scissors or a sharp utility knife
- Flathead screwdriver
- Pliers
- Ladder or step stool (if needed)
Step 2: Measure and mark
Remove the blinds from the window brackets. Measure how much length needs to come off and mark the spot with a pencil. Double-check the measurement before doing anything else.
Step 3: Remove the bottom rail
Use a flathead screwdriver to lift the caps or plugs covering the strings on the bottom rail. Untie or release the knots holding the strings in place, then slide the bottom rail off the strings and set it aside. Keep the small caps and plugs in a small dish so they don’t disappear.
Step 4: Cut the strings
Find the mark for the desired length and carefully cut the strings using sharp scissors or a utility knife. Sharp tools matter here, since dull blades fray the cord and weaken the tension. Cut each string evenly to keep the blind balanced.
Step 5: Remove excess slats (if needed)
Significant length reductions usually require pulling out a few slats. Slide them off the strings until you reach the desired length. Removing slats affects the fullness and look of the finished blind, so a slow, deliberate approach beats a fast one.
Step 6: Reattach the bottom rail
Slide the bottom rail back onto the strings and position it evenly. Tie a knot to secure each string, using pliers to pull the cord as tight as possible. Trim the excess and replace the caps or plugs to hide the knots.
Step 7: Test and adjust
Carefully test the blinds. Lift and lower a few times to check for smoothness. Any unevenness or resistance means the string tension or rail position needs a small adjustment.
How to cut blinds to size at home
Cutting blinds to size means trimming in two directions: width (the horizontal measurement of the headrail and slats) and length (the vertical drop). Most articles on how to cut window blinds only cover one. We’ll cover both, plus when each is worth attempting and when it’s smarter to start fresh with a custom set built for the exact window.
The guide above handles the length side. Cutting blinds to size on the width is a separate job, and the tools, technique, and risk all shift.
Width cuts vs. length cuts: what’s actually different
Shortening blinds to length means removing slats and the bottom rail. The headrail and the lift mechanism stay untouched. Width cutting means trimming the headrail, the bottom rail, and every single slat across the horizontal span. Lift cords route through specific channels inside the headrail, and any trim misalignment will leave the blinds hanging crooked or refusing to lift at all.
Length changes are forgiving. Width changes rarely are.
The simple rule: shortening is doable for a careful DIYer. Width cutting almost always ends with a customer ordering custom-sized replacements anyway.
Tools that actually matter for width cuts
The list above covers the basics. A few additions worth knowing before you cut window blinds on the width:
- A miter saw or hacksaw for the headrail (scissors won’t cut metal or hardwood)
- A fine-tooth saw blade for real wood blinds, since rough blades chip the finish
- Painter’s tape to mark cut lines cleanly without permanent marker bleed
- A clamp or bench vise to hold the rail steady (freehand cuts on the kitchen counter rarely come out square)
- A small file or fine sandpaper to smooth metal burrs after the cut
Skip the cutting jig kits sold online unless you’ve used one before. They speed things up but come with their own learning curve.
Cutting blinds by material type
Material matters more than most guides admit.
Faux wood blinds: Composite material. Cuts cleanly with a fine-tooth saw, and edges can be sanded smooth. The most forgiving option for a width trim.
Real wood blinds: Natural grain splinters easily. A high-tooth-count blade and a slow feed rate are required. Touch-up stain or paint is often needed on the cut edge to match the factory finish.
Aluminum mini blinds: The headrail is metal, and the slats are thin aluminum. A hacksaw works for the rail; sharp tin snips handle the slats. Wear gloves, since cut aluminum edges are surprisingly sharp.
Vinyl mini blinds: The softest of the bunch. A sharp utility knife handles the slats, and a hacksaw handles the rail.
Cellular shades, roller shades, Roman shades, and woven wood shades. Cannot be cut at home. The fabric, mechanism, and bottom rail are factory-bonded into one assembly. Trying to trim a shade ruins it. Order a replacement instead, and the cellular shade collection is worth a look if you want a more energy-efficient swap while you’re at it.
Common mistakes when cutting window blinds
We see the same handful of missteps in customer photos, and most are easy to avoid.
Measuring once
Always measure twice, in three spots (top, middle, and bottom for width; left, center, and right for length). Window frames are rarely perfectly square, and the smallest measurement is the one to trust.
Cutting before removing
The blinds need to come off the wall first. Trimming them in place leads to gouged drywall and uneven cuts.
Ignoring the lift cord path
On corded blinds, the cord routes through specific channels inside the headrail. Cut into that path, and the blinds stop working. Cordless blinds have similar internal mechanisms that need the same respect.
Cutting both ends
Always trim from one side only. Cutting an equal amount off each end doubles the chance of error and almost never centers the mechanism correctly.
Skipping the dry fit
After cutting, hold the blinds up to the window before reassembling everything. A 1/8-inch error in width is the difference between a clean fit and a return.
When cutting isn’t worth the time
Honest moment. The math on cutting blinds rarely favors the DIYer.
A stock big-box set sounds cheap until you add a couple of hours of labor, the risk of ruining the set during the cut, and the fact that off-the-shelf cutdowns still won’t fit perfectly because they’re sized for standard windows, not yours. Most customers who try this once don’t try it twice.
Custom blinds from our team arrive built to the exact width and length of your window, with the lift mechanism pre-aligned and the slats stacked correctly out of the box. Production runs in as little as 5 to 7 business days, shipping is free across the contiguous US and Canada, and the 30-day Blindsgalore Guarantee covers wrong size or wrong color. No saw, no sanding, no second trip to the hardware store. Our step-by-step measuring guide walks through every window type so the new set fits the first time.
A note on safety after cutting
Cut blinds, especially older corded styles, can leave dangling cord ends or sharp metal edges behind. If young children or pets are in the home, replace cut corded blinds with cordless or motorized options right away. Cordless lift is the safer standard for any room used by kids, and it removes the most common safety hazard in any cut window covering.
What to do if a cut goes wrong
Mistakes happen. If the cut went sideways and the blinds won’t lift, won’t sit level, or look uneven across the window, the fix is usually a replacement, not another repair. Cut headrails can’t be re-extended. Slats trimmed too short can’t be lengthened. Once material is removed, it’s gone for good.
The good news: a custom replacement is a five-minute order and a one-week wait. Our in-house experts can walk through measuring on the phone before the order goes in, so the next set fits the window the first time. Call (877) 702-5463 for free help, no upsell pressure.
Precautions to keep in mind when shortening or cutting blinds
A DIY approach has real risks. Uneven cuts, damaged slats, frayed cords, and the sheer time required can turn a quick fix into a frustrating afternoon. If you find yourself losing patience halfway through, stop. Step back. Reassess.
Removing slats by hand is a complex undertaking with no undo button. Small errors lead to malfunctioning window treatments and wasted money. Don’t say we didn’t warn you.
The cleaner path is usually a custom replacement. With every style, material, and customization option built to your exact window, the perfect fit shows up at the door without any guesswork. Make it motorized while you’re at it. Why not?
FAQs
How do you shorten blinds that are too long?
Remove the bottom rail, untie the lift cords, slide off any extra slats, cut the cords at the new length, and re-tie the rail. Detailed steps are in the section above.
Is it OK to get blinds that are too long?
Not really. Extra length creates a heavy stack at the bottom of the window that strains the lift mechanism, blocks light, and looks unfinished. A custom-sized blind solves the problem permanently.
Can you cut blinds that are too wide?
Some types, yes. Aluminum and vinyl mini blinds, faux wood, and real wood horizontal blinds can be width-cut with the right tools. Cellular shades, roller shades, Roman shades, sheer shades, and woven wood shades cannot. The fabric and mechanism of a shade are sealed into the assembly at the factory.
What to do if the blinds are not long enough?
Length cannot be added back to a horizontal blind. The fix is a replacement, ideally a custom order built to the actual window measurement.
How do I cut blinds to size without breaking them?
Remove the blinds from the window first, mark cut lines on both ends of the headrail and bottom rail with painter’s tape, and use a hacksaw or miter saw with a fine-tooth blade. Cut from one side only (never both), and dry-fit the assembly against the window before reattaching the slats and rails.
Is cutting blinds at home cheaper than ordering custom?
Rarely, once labor and risk are factored in. A custom set fits the window perfectly the first time, ships in 5 to 7 business days, and is backed by a 30-day exchange guarantee.
What’s the difference between shortening blinds and cutting blinds to size?
Shortening reduces the length (the vertical drop) by removing slats and re-tying the lift cords. Cutting to size usually refers to width, which means trimming the headrail, bottom rail, and every slat horizontally. Length is the easier job; width is the one that most often goes wrong.
A perfectly sized blind is a small, daily kind of joy. The light lands where it should, the lift feels effortless, and the window finally looks the way you pictured it. Whether you take the DIY route or skip the saw and order a custom set, the goal is the same: a window that feels like yours.
Love your view.