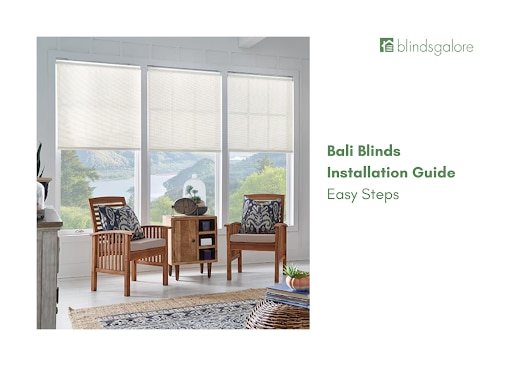
You’ve picked out the perfect Bali window blinds, and now you’re ready to see them transform your space from meh to marvelous. The great news is that a DIY blind installation is simpler than you might think. At Blindsgalore, we believe everyone can be a DIY expert.
We’ve been helping people create their dream windows for over 25 years, and we’re here to guide you through every step. Forget stressing, because this process is straightforward. With our help, you’ll have your new blinds up in no time, giving your room a fresh, polished look. You can refer to our installation guide for more information about Bali blinds installation.
Before You Begin: The Prep Work
A little preparation makes the entire Bali blinds installation process smoother. Taking a few minutes to get organized will save you time and ensure a flawless result.
Gather Your Tools
You don’t need a professional workshop for this project. Whether you’re a DIY expert or not, installation will be a breeze. All you’ll need are a few basic tools:
- A steel tape measure
- A pencil
- A drill with the correct size drill bit
- A screwdriver
Unpack and Inspect
Carefully unpack your new Bali window blinds from the box. Lay everything out and check the packing list to ensure all the parts, including brackets and screws, are present. Take a moment to inspect the headrail, fabric, and components for any signs of shipping damage. If you need to take down your old blinds first, we have a simple guide that can walk you through it.
Crucial Don’t: A Note on Cleaning
Before you even start, here’s a critical piece of advice for the long-term care of your blinds: we would never advise customers to submerge their blinds or shades in water. This applies to all types, including motorized, blackout, and light-filtering fabrics. Water can damage the materials, mechanisms, and internal components.
The First Crucial Step: Measuring for Bali Blinds
Accurate measurements are the foundation of a successful DIY blind installation. Even if you already have your blinds, understanding the difference between an inside and outside mount is key to knowing how they’ll fit.
- Inside Mount: The blinds fit neatly inside the window frame for a clean, built-in look. This is the most common mounting style.
- Outside Mount: The blinds are mounted on the wall or trim above the window. This can make a window appear larger and is also a great solution for windows without enough depth for an inside mount. If you’re considering this for a stylish treatment like Roman shades, exploring ideas for outside mount Roman shades can provide great inspiration.
For detailed instructions, our comprehensive measuring guide is your best friend. It eliminates all the guesswork.
How to Install Bali Blinds: A Step-by-Step Guide
You’ve done the prep work, and now it’s time for the main event. These steps are a general guide for the most common types of Bali window blinds, like cellular or roller shades. Always refer to the specific instructions included with your product, which you can also find on our Bali installation page.
For an Inside Mount
- Mark Bracket Locations: On an inside mount, installation brackets will be screwed in place through the hole in the top of each bracket. Hold a bracket at each end of the window frame’s top interior surface. Use your pencil to mark where you’ll drill the pilot holes. For wider windows, you may have a center support bracket; space it evenly between the two end brackets.
- Install the Brackets: Pre-drill the holes you marked to make screwing the brackets in easier. Then, secure each bracket using the provided screws. Make sure all brackets are level and aligned with each other.
- Mount the Headrail: With the front of the shade facing you, insert the front of the headrail into the brackets. Gently rock it backward until you hear a satisfying “click”. This sound means it’s securely locked in place. Give it a gentle tug to be sure.
For an Outside Mount
- Mark Bracket Locations: For an outside mount, the brackets are screwed into the wall or window trim through the holes on the back of each bracket. Position the headrail where you want it to hang, ensuring it’s centered and level. Use your pencil to mark the wall through the back holes of each bracket.
- Install the Brackets: Just like with an inside mount, pre-drill your marked holes. Screw each bracket securely into the wall or trim. Double-check that they are perfectly level and aligned before moving on.
- Mount the Headrail: Hold the headrail up to the brackets. Insert the front lip into the brackets and push it backward until it clicks securely into place. Ensure the fabric isn’t pinched between the headrail and the brackets.
And that’s it! A few quick steps and your windows are dressed. Look at you, expert!
Installing Different Types of Bali Window Blinds
While the basic process is similar, some blind types have unique considerations. Bali window blinds come in many styles, from calming fabric finishes to dramatic, eye-catching styles.
- Cellular and Roller Shades: These are often the easiest to install due to their lightweight design and simple bracket system. The steps above are a perfect match for these popular styles.
- Wood and Faux Wood Blinds: These blinds are heavier, so ensuring your brackets are securely anchored in a wall stud or with drywall anchors is crucial. They often come with a decorative valance that clips on easily after the headrail is installed.
- Vertical Blinds for Sliding Doors: Large openings like sliding glass doors and wide windows require specific solutions. Vertical blinds, panel track blinds, or even custom drapery are excellent choices.
The installation for these involves mounting a longer headrail and then attaching each vane or panel individually. We have a dedicated guide on how to install blinds on a sliding glass door that offers more specific tips.
What About Motorization and Smart Homes?
Upgrading to motorized Bali window blinds is one of the best ways to add a touch of luxury and convenience to your home. We strongly recommend motorization in all homes, as it creates a completely cordless and safe environment for children and pets.
Many people think motorization means a complicated installation, but it’s just as simple as installing a manual shade. The motor is housed within the headrail, and many options are powered by a rechargeable battery, so there’s no need for an electrician. You can choose a simple remote or a wall-mounted wand control.
For the ultimate convenience, you can integrate your motorized blinds with a smart hub. Brands like the Bali Gateway, Levolor InMotion, and our own Connector Smart Hub allow you to control your shades with an app or your voice. These hubs are compatible with popular smart home systems, including:
- Alexa
- Google Home
- Samsung SmartThings
Imagine telling your home to open the blinds as you wake up or programming them to close automatically at sunset. That’s the power of a fully connected home.
Post-Installation Care and Crucial Don’ts
Now that your beautiful new blinds are up, you’ll want to keep them looking their best.
Cleaning Your New Blinds
For most Bali window blinds, regular dusting or a gentle pass with the brush attachment of your vacuum is all that’s needed. This prevents dust and debris from building up on the fabric or slats.
Crucial Don’t #2: The No-Water Rule
As we mentioned earlier, it’s worth repeating: never submerge your blinds or shades in water. This can cause irreversible damage to the fabric, internal mechanisms, and motors. For spot cleaning, use a damp cloth with a mild detergent, but be careful not to soak the material.
It’s also important to know that our warranties do not cover issues like fading from the sun. However, many of our fabrics are designed to be durable and resist UV rays, protecting your furniture and floors.
Why Choose Blindsgalore?
When you choose us, you’re not just buying a product; you’re joining a family. As a women-and-family-owned business, we pour over 25 years of expertise into every handcrafted Bali window treatment we make. All our products are 100% custom-built to your exact specifications, ensuring a perfect fit every time.
We back our craftsmanship with a free 3-year warranty, which you can upgrade to five years, and our industry-best guarantee. Plus, your custom shades can be shipped out in as little as 5-7 business days, with free shipping across the continental U.S. Our in-house team of design experts is always here to help, ensuring your journey from start to finish is as seamless as your new shades.
FAQs
For most standard windows, you can expect the installation to take under an hour, and often as little as 20-30 minutes per blind. Our instructions are designed to be clear and simple, so you won’t be guessing or stressing.
Bali blinds are versatile and can be installed on most standard windows. For unique shapes like arches or angled windows, you may need specialized products. We have guides for unique situations, like what to do with a Palladian arch window.
We understand that mistakes happen! That’s why we offer an industry-leading guarantee. We offer free product exchanges for any reason, including measurement errors, within 30 days on up to four windows per household.
Not at all! Most of our motorized options, including those with a rechargeable battery wand, install with the same simple brackets as our manual shades. There is no complex wiring involved, making it a simple and rewarding upgrade.
Your blinds will arrive with a detailed installation guide tailored to your specific product. You can also find installation guides for all our products, including Bali, right on our website’s installation page.